Roasted Butternut Squash Lasagne

Standard

This is a recipe that we improvised at home a few weeks ago – but unfortunately we haven’t taken a picture of it either time. We tend to eat this over two nights, so I guess it would serve 4 at one sitting – although perhaps accompanied by some bread?

Pre-heat the oven to around 220C.

  1. Peel and dice a large butternut squash, and put it in a roasting tin. We dice into relatively large chunks – it’s up to you, but the smaller you dice it, I guess the shorter you’ll want to roast it
  2. Season with salt, pour some oil (we use a cheap rapeseed oil – basically anything that can cope with the high roasting temperature – which probably means not olive oil). You could put some woody herbs like thyme or rosemary in as well, although we haven’t
  3. Put the squash in the oven to roast – 30 minutes will do it for a relatively large dice, but basically until it is cooked through and soft. Once the squash is done you’ll want to turn the oven down slightly – to around 180C
  4. While the squash is roasting make a tomato sauce – we recommend making it with fresh tomatoes which keeps it lighter than the tinned. Basically chop an onion and fry gently to soften in plenty of olive oil (Damyanti says “lots of olive oil”), add some crushed garlic, some oregano. Blanch, skin and chop the tomatoes in the meantime, and then add them. Simmer it until it has reduced to a nice consistency – you don’t want too much liquid
  5. Make a bechamel/white sauce (sorry, not going to go into this here – but plenty of places you can find out how to do this)
  6. Now build the lasagne – first a layer of tomato sauce, then squash, then some fresh spinach leaves scattered over, then lasagne sheets (we use fresh and find you can just use it , but if you use dried you’ll want to put it in some boiling water first), repeat this pattern, and then top the final sheet of lasagne with the bechamel sauce.
  7. Put the whole thing in the oven for about 20-30 minutes – until the top has gone nicely brown

That’s it – it sounds complicated but to be honest it doesn’t feel like a big hassle once the squash is in the oven – it gives you time to do everything else. We really like it, and recommend it!

Malt Loaf

Standard

Making Malt Loaf

A few weeks ago, I got this craving for Malt Loaf, and thought it would be a good thing to bake. I didn’t have a recipe at home, so I asked for a recommendation online, and Anna (after suggesting I could just go and buy some Soreen), came up with the following:
75ml (2 1/2 fl oz) hand-hot water
200g (7oz) brown flour or 100g (3 1/2 oz) wholemeal flour and 100g (3 1/2 oz) strong white flour
2.5ml spoon 1/2 tsp) salt
2 x 15ml spoons (2 tbsp) malt extract
2 x 15ml spoon (2 tbsp) black treacle
25g (1oz) margarine
30g (1oz) dark soft brown sugar
100g (3 1/2 oz) sultanas
Honey or golden syrup to glaze

Yeast:
2 x 5ml spoons (2 tsp) conventional dried yeast + 5ml spoon (1 tsp) sugar
or 15g (1/2 oz) fresh yeast
or 1 x 5ml spoon (1 tsp) fast action easy blend yeast

  • Stir the dried yeast and sugar into the water and leave until frothy, or blend the fresh yeast with water, or mix the easy blend yeast with the flour.
  • Place the flour and salt in a bowl, add the sultanas.
  • Warm the malt, treacle, margarine and sugar until just melted and the sugar dissolved, and stir into the flour with the yeast liquid. (Note: if using instant yeast add to dry flour and warm the water with the malt mixture).
  • Mix to a soft dough.
  • Turn onto a floured surface and knead until no longer sticky (about four minutes), adding more flour if necessary.
  • Shape and place the malt loaf in a greased 500g (1lb) loaf tin. Cover the dough and leave to prove in a warm place until doubled in size – about one and a quarter hours.
  • Bake at 220°C, Gas Mark 7, for 30 minutes until browned and the malt loaf sounds hollow when tapped on the bottom.
  • Cool the Malt Loaf on a wire rack. Whilst the loaf is still hot brush the top with honey or syrup.

So Bryn and I set to making our first ever malt loaf. After mixing the dry and wet ingredients we weren’t left with a ‘soft dough’ but rather a pretty sloppy looking batter. Luckily Bryn was pretty good at adding liberal amounts of extra flour 🙂 I’d guess maybe as much as another 50g (strong white bread flour). It was still pretty sticky, but with a liberal dusting of flour on my hands I was able to knead it a bit, and get it into a loaf shape.

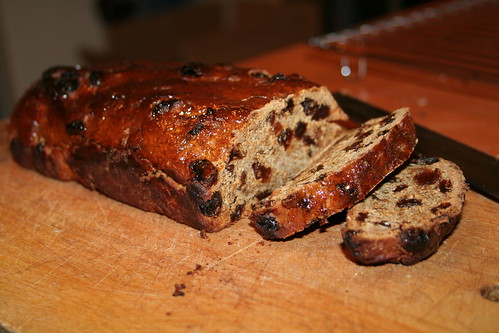
It didn’t really seem to rise much, but we put it in the oven, and hoped for the best. The result was a dense, but rich flavoured bread, with a crunchy crust when it was fresh out of the oven. We ate it while it was still warm, with butter, but it was even better the next day (with butter again!). Soreen it isn’t, but it is very nice.

Slices of Malt Loaf

Slices of Malt Loaf

Trio of curries

Standard

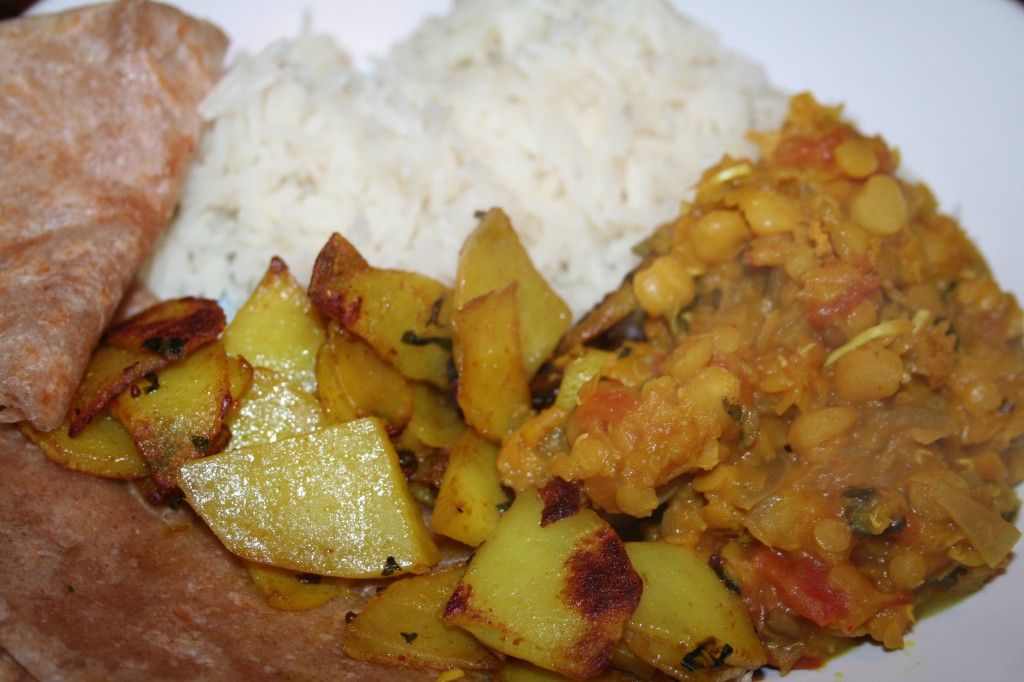
I felt like curry last Monday, with Owen going to be home late, I had an hour to myself to kill but hadn’t been shopping luckily we had lentils, potatoes and eggs so I made tarka dhal, egg curry and bombay potato curry.

Curry

Before making a curry it’s best to make up some masala – a mixture of chilies, garlic and ginger all finely chopped and mixed with a ratio of 2 chilies to 1 garlic clove and small knob of ginger.

Scrambled Egg Curry – this is one of my favourite my curries and only takes 10 mins to make

  • Sliced Onions
  • Eggs x 2
  • Masala
  • Turmeric (pinch)
  • Cumin powder (pinch)
  • Coriander powder (pinch)
  • Coriander Leaves

Fry the onions slowly, once they are translucent and browning add the chopped chilli, garlic and ginger and the dried spices. Fry for a minute or two while stirring, then break in 2 eggs and scramble until the eggs are cooked well. Once cooked stir in some fresh coriander leaves.

Bombay Potato – another of my favourites

  • Potato x 3
  • Oil – 1 tablespoon
  • Mustard seeds – pinch
  • Masala
  • Chili powder – pinch
  • Turmeric – 1/2 teaspoon
  • Cumin powder – 1/2 teaspoon
  • Coriander powder – 1/2 teaspoon
  • salt – pinch
  • Coriander leaves

Quater the potato and then finely slice, each piece about 1cm thick, its best to try and get all the slices to be the same size and thickness so they cook evenly, rinse in cold water.
Add the oil to a frying pan then the mustard seeds. Once they start popping add in the sliced potato and stir (be careful as the oil will spit). Add the masala, spices and salt and stir. Leave to cook on a low heat till the potatoes are soft, if they start to stick to the pan add a little more oil. When the potatoes are nearly cooked add some coriander leaves.

Tarka Dal – I use a recipe from ‘Easy Indian’ by Das Sreedharan. Serves 4-6. This a good curry to make as you just add all the ingredients to the pan and leave, its also a good curry to freeze.

  • Red lentils – 200g
  • Yellow split peas – 50g
  • Sliced Onions x 2
  • Diced tomatoes x 2
  • Garlic cloves chopped x 2
  • Green chili sliced x 2
  • Chili powder 1.2 tsp
  • Turmeric 1 tsp
  • To finish – 4 cloves of garlic sliced & 1/2 tsp of cumin seeds

Add all the ingredients to a big pan and then add about 2 pints of water and bring to the boil. Once boiling, reduce the heat and leave to simmer with lid on for about 20 mins or till the lentils begin to soften. I find the red lentils cook quicker than the yellow. Leave uncovered for 5 mins. If very watery then I tend to pour some of the liquid out as I prefer my dhal to be thick. Before serving, fry a little oil in a small frying pan and add some cumin seeds and the sliced garlic, once the garlic starts browning pour into the dhal.

Focaccia

Standard

This is another bread recipe from Dough by Richard Bertinet. It starts with his basic olive oil dough which is:

  • 500g Strong White flour
  • 20g Coarse Semolina
  • 10g Salt
  • 15g Yeast (fresh if possible)
  • 50g Extra virgin Olive oil
  • 320g water

Make up the dough and knead it well (it will be quite sticky at first, but should get firmer as you knead). Rest the dough for an hour in a covered bowl. Oil a baking sheet, and turn the rested dough out onto the sheet. Spread out the dough on the sheet by pushing it with your fingers (don’t roll it out or stretch it). Drizzle some olive oil over the top and spread it across the dough (easiest to do this just with your hands)

Cover the dough to rest for 45 minutes. I find that putting it in a plastic bag is the easiest thing, and doesn’t stick (the first time I made it, I used a tea towel, and ended up scraping half the dough off the towel). After it has rested use your finger tips to make dimples across the whole dough – just push your fingers into the dough. Then cover again and leave for a further 30 minutes.

Finally sprinkle some good quality sea salt (e.g Maldon Sea Salt) over the top (you want salt flakes, rather than granules), and bake in the over at 220 degrees C for 25-30 minutes. The original recipe adds rosemary at the same time as the salt, but we’ve been out of rosemary every time I’ve baked it so we haven’t tried it yet.

After it comes out of the oven, but while it is still warm, brush with more olive oil.

We absolutely love this bread – probably a bit too much. Delicious dipped in more olive oil and balsamic vinegar.

We’ve tried the same recipe as a pizza base – 500g flour made 3 medium sized bases when stretch out more thinly. They were still pretty thick, but good flavour.

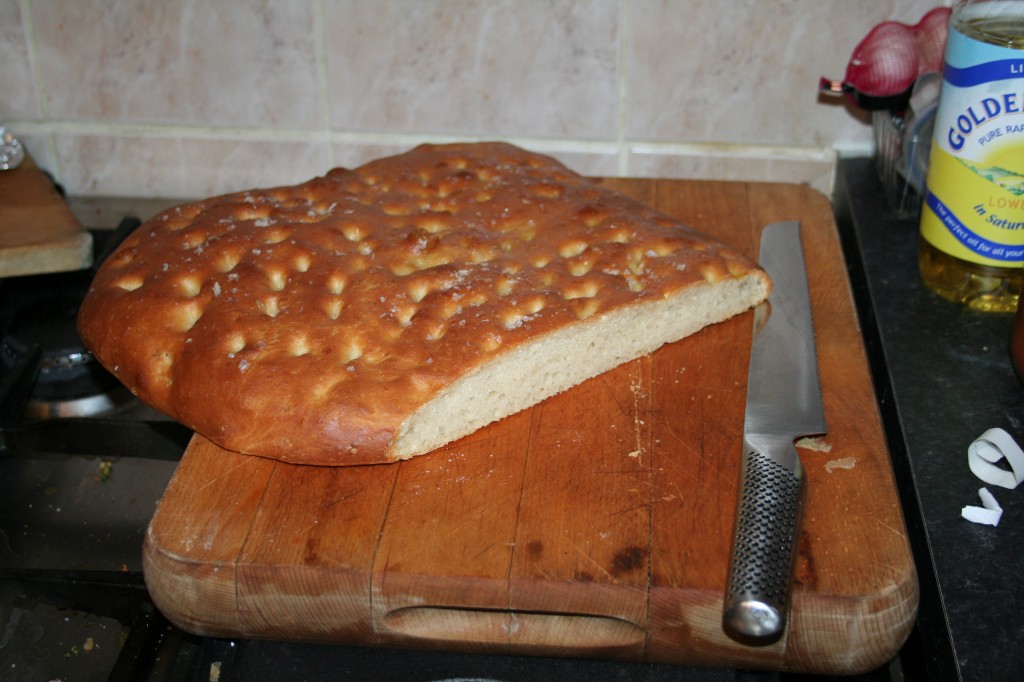
Picture of a loaf of focaccia

Picture of a loaf of focaccia

Summer Salmon with peas, beans, potatoes and samphire

Standard

IMG_5980

This is based on a Jamie Oliver recipe (from Jamie’s Dinners), but with some slight variations.

  • Salmon fillets
  • Runner beans
  • Broad beans (we took the outer skin off because I’m fussy and think they are bitter)
  • Peas
  • (we stopped here, but any other seasonal green stuff you want)
  • Samphire (this was an impulse buy when we saw it in the fishmongers)
  • Lemons
  • Dill
  • New Potatoes – we used Anya, but any small variety – like Red fur apple or Rattes

Pre-heat the oven to 230 degrees.

Boil the potatoes for 10 or so minutes, and add any beans that might need a bit of pre-cooking – for us, just the runner beans – for a few more minutes. You don’t want them completely cooked, as it is all going into the oven for 15 minutes.

Descale the salmon (just scrape the scales off with a knife), cut into portion sized bits, and cut two or three slits in the skin. Roughly chop the dill, and push into the slits.

Drain the potatoes and other veg and put into a baking tray with all the other veg and samphire. Season with salt and pepper (if you are using samphire you won’t need much salt as it is quite salty), add lemon zest and lemon juice (we used 2 lemons for 6 people) and mix together. Lay the salmon portions on top, and drizzle with oil. Put the tray in the oven for about 15 minutes – basically until the salmon is cooked.

And that’s it – incredibly easy, and tastest great, especially eaten outside with a glass of wine, in the company of family and friends on a beautiful summer’s day.

Rye Bread

Standard
Rye Bread

Rye Bread

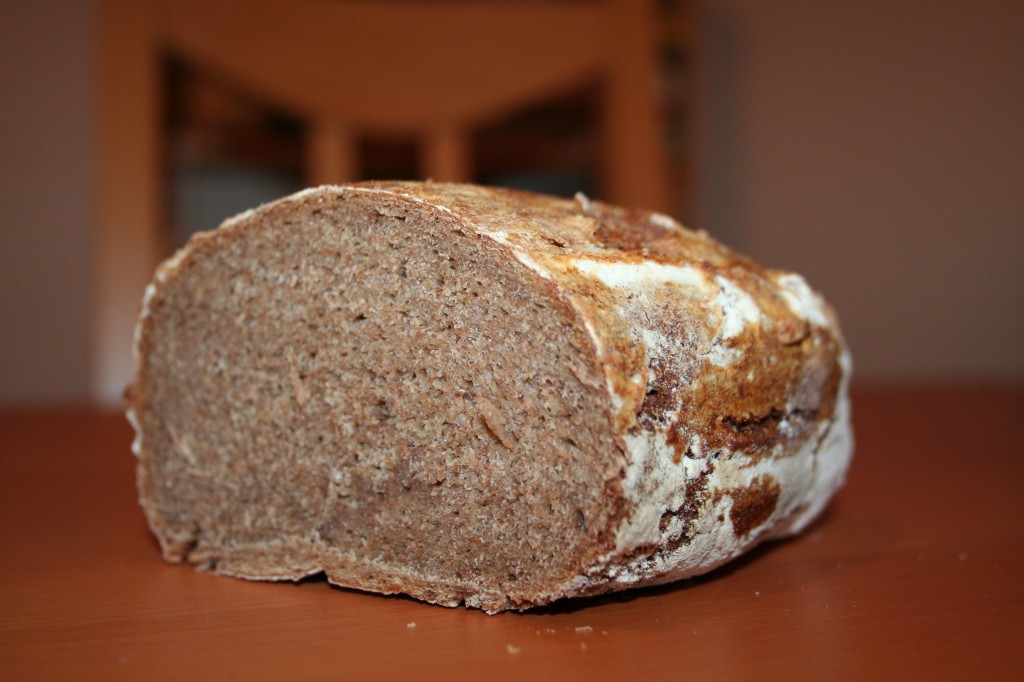
Admittedly, it doesn’t look very impressive – but this was the product of many hours of dedicated labour – and it tastes – well, like Rye Bread – so job done.

Two books have both enthused me about making bread over the last year. One I’ve already mentioned on this blog – Dough by Richard Bertinet. The other, and the one which this recipe comes from, is The Handmade Loaf by Dan Leppard. The recipes in The Handmade Loaf were collected by Dan from around Europe.
Dan Leppard’s approach to bread making is not for the impatient or the short of time. Many of them rely on a natural leaven – that is a ferment made from naturally occuring yeast. Initially the leaven takes several days to get going, but once you have a mixture that is fermenting you can keep it going by ‘feeding it’ – that is topping it up with flour and water.
Since this Rye Bread uses the natural leaven – this is where I should start. The instructions (and pictures) in the book are so good it seems both pointless, and unfair to the author, to repeat them here, but I’ll summarise quickly:
Mix 50g water, 2 tsp rye flour, 2 tsp strong white flour, 2 tsp currants or raisins, 2 tsp live low-fat yoghurt in a (atleast) 500ml jar, and leave at room temperature for 24 hours
Add a further 50g water, 2 tsp rye flour and 2 tsp strong white flour, stir well, and leave for 24 hours
Add 100g water, 4 tsp rye flour, 4 tsp strong white flour, stir in, and leave for 24 hours
Remove 3/4 of the mixture, add 100g water and stir well. Strain out the raisins/currents. Add 125g strong white flour and stir well – the leave for 24 hours
Add 100g water, stir well, add 125g strong white flour, stir well, leave for 24 hours
As you can see – this has already taken you 5 days – and you haven’t even started on the bread yet!
You should have a leaven that is now fermenting. To keep this going, every 24 hours you need to use, or otherwise dispose of, 3/4 of the leaven and top up with 100g water and 125g strong white flour (or in these proportions)
However, for the Rye Bread I needed a Rye Leaven instead of the white leaven that is described here. To make a Rye leaven you simply take the leave above and start feeding it with Rye flour and water rather than strong white flour and water. However with Rye flour you need a bit more water – I ended up using 125g Rye and 125g water for each refresh. I repeated this over a few days, refreshing roughly every 48 hours discarding 3/4 of the mixture and adding these proportions of water and rye flour – I think I refreshed like this 3 or 4 times.
With the Rye Leaven ready, you can start on the bread:
Boil water and measure out 240g – then let it cool to 90 degrees, and then whisk in 60g of rye flour – I have to admit I didn’t measure the temperature, I just boiled the water, poured out 240g into a bowl, and then whisked in the flour. The recipe suggests that adding the flour to water at different temperatures creates different textures to the final loaf.
Leave this mixture for at least an hour (I left it for just 1 hour), up to 24 hours
Now add 200g rye leaven to 50g water – and whisk in all but 1-2 tbsp of the rye and water mixture you made earlier (you use this little bit you have saved to brush the loaf later)
Add in 300g rye flour, 1 tsp salt and mix well
You’ll have a very wet dough
The recipe says to knead this ‘gently’ on an oiled surface – I have to say I found this very difficult. The dough was extremely wet, and despite the oil stuck to the surface quite quickly. From the description in the recipe it is not at all clear if you knead for just a few minutes, or until the dough firms up a bit and becomes easier to handle.
I was a bit less ‘gentle’ with the dough to try to get it to firm up, but in the end floured my hands liberally (although trying not to put more flour into the mixture, since in general the recipes Dan Lepard gives do result in quite wet doughs – and this is deliberate not a mistake), and shaped into a loaf.
Once you have a loaf, wrap in a (very very) well floured cloth, and leave to rise for 5 hours.
The recipe suggests the loaf will double in size – mine didn’t come close to this. Although you could tell that the dough had relaxed somewhat, it was hard to see if it had actually increased in size at all after 5 hours – maybe just a very little.
While the loaf is rising, pre-heat the over to 210 degrees. Don’t do what I did and accidentally switch the oven off, rather than switching it on 🙂
Turn the loaf onto a floured tray, and brush the top of the loaf with the leaven/flour/water mix from earlier, spray the loaf with water and bake in the over for 50 minutes, spraying again after 5 minutes.
The resulting loaf will be dense (I thought I’d baked a brick when my came out) – but will have that very distinct, and delicious, rye bread flavour. The bread goes well with a good hard cheese (something strong like Lincolnshire Poacher), smoked salmon, or just with some nice creamy butter. It may take 6 or so days to make, but it is worth it.
Green Filo Pie

Standard

This is one of the first dishes Owen ever cooked for me, and is a great way of using up lots of green vegetables. As usual I don't tend to follow any particular recipie, hence the quantities are a little vague. I tend to use enough vegetables to feed four and about 2-3 tablespoons of yogurt.

Filo Pastry
Spinach
Courgette – diced
Peas
Sprouting Broccoli
Leeks – sliced
Yogurt
Feta – 250g packet
Cumin
mint
Parsley
Oil

Fry the leeks till soft, add the courgette, followed by peas and broccoli till they are all cooked, season with salt and pepper. Once they are cooked tip into a bowl and mix in some yogurt, feta (cubed) and a pinch of cumin. Add in a handful of chopped mint and parsley.

Brush a dish with oil and then layer a sheet of filo pastry, brush with oil and add another layer, I normally place about 6-10 sheets of filo pastry. Add the filling and then top with more sheets of filo pastry, then place in a hot oven to bake for about 30 mins.

Fish, Chips and Mushy Peas

Standard

For years I believed that deep frying something was some dark art, and one you wouldn’t attempt at home without a deep fat fryer – probably because of those films that showed how cooking chips was essentially a short cut to burning down your house. Since then, my wife’s delicious samosas, pakoras and other great tasting snacks taught me otherwise. Despite this I only did fish in batter for the first time last year, and (for health reasons) oven cooked, rather than fried, the chips. Whether this really helps on the health front when I’ve deep fried the fish I’ve no idea – especially when you look at the mushy pea recipe.

In summary, this was easier and much better than I expected, but for those watching fat intake should be saved for special occasions.

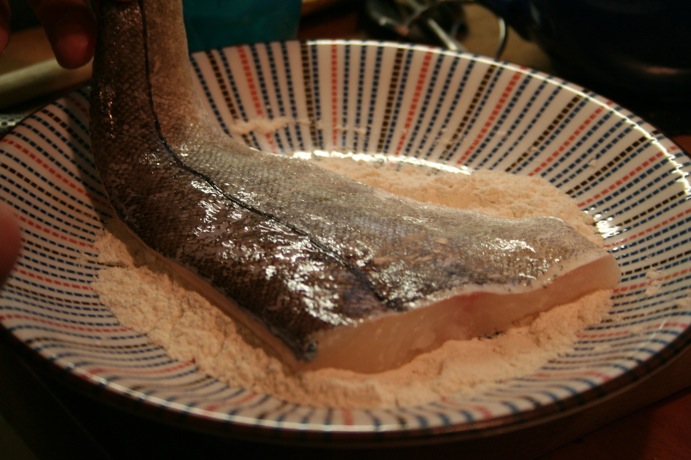
Preparing the fish

Preparing the fish

I’ve done this with both plaice and haddock (pictured here), but I think plaice works better (mainly because it cooks much much quicker.

For the chips, I just slice the potato (peeled or not depending on what
you like) into chip sized pieces, dry off (with a tea towel), and put into a roasting tin with some salt and good quality, extra virgin, rapeseed oil. Put in the over for about 30 mins – give them a turn/shake about half way through.

Easy.

I then do the mushy peas, because they can be cooked, and kept warm or reheated later if necessary (this is from Jamie Oliver):

  • Frozen or fresh peas (you get a different texture depending, but both taste nice)
  • Fresh mint – chopped
  • Butter
  • Lemon juice
  • Salt/Pepper

Put the peas and chopped mint in a saucepan with a knob of butter, put the lid on and simmer (no water required) – 10 minutes or so (possibly a bit more if you are using fresh peas). Add lemon juice (to taste) and salt and pepper (of course, to taste). Then mash them – I prefer them to mash them reasonably roughly.

Chopping Mint

Chopping Mint

OK – now the fish. Obviously you want to be using fillets – as I say, flat fish cooks quicker, and I think is better (Marco Pierre White says that you can’t beat fish and chips made with turbot – I’ve had to take his word for it to date).

The batter (for 2 fillets):

  • 110g flour
  • 140ml Cold Hoegaarden (I’ve tried other beer, but I think the subtle spices in Hoegaarden work well)
  • 1 1/2 teaspoons baking powder (that’s one heaped, one level)

Mix all these together and whisk until smooth – you want it to be thick enough to stick to the fish!

This is probably the point to put the oil on – you can use vegetable, rapeseed or sunflower oil – any oil that is suitable for deep frying (basically not olive oil). I’ve started doing this in a wok – it heats up extremely quickly, and you can get away with a relatively small amount of oil – also the wok is going to be oily anyway, so you aren’t going to ruin it this way.

You can tell when the oil is ready by dropping in a crumb of bread – you want it to ‘fizz’ and float to the top of the oil.

Season the fish with salt and pepper, then put some flour on a plate and lie each fillet in, one at a time, to cover with a thin layer of flour – shake off any excess.

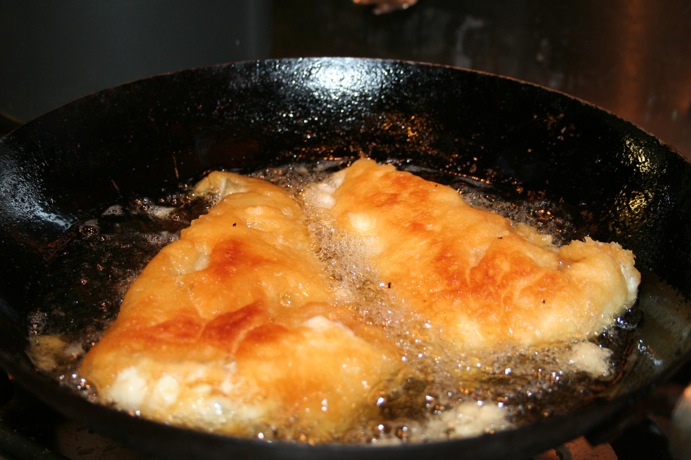
Dip the fish in the batter mixture – make sure it is covered, then hold it up and shake it a bit – letting excess batter drip off. Carefully lay the fish into the hot oil (see advice on checking the temperature above) – you really want to be careful here. You should be able to do two fillets at the same time in a reasonably sized wok. They’ll take a few minutes each – it really depends on the thickness of the fillet. You’ll also probably want to turn them over after a couple of minutes – essentially once the bit in the oil is crispy and brown, I would turn to get the same colour on both sides. Once they are done, take them out and put them on kitchen paper to drain. I cut into one of them at this point to check it is done – if not, back in the oil for a bit longer. I do find this can be tricky, as it can all start to fall to pieces if you aren’t careful – in general it is much better if they are done at this point!

Frying Fish

Frying Fish

Hopefully everything is done by this point, and you can serve up – with plenty of salt, malt vinegar, and if you like, ketchup.

Oriental Sea Bass with spicy dipping sauce

Standard

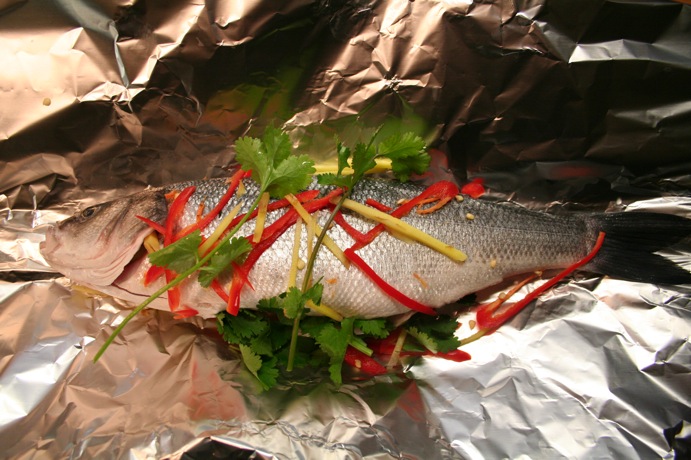
Sea Bass preparation

Sea Bass preparation

Appetite by Nigel Slater
is one of my favourite cookery books. I have to admit that if I’m
cooking from a recipe, I generally like to follow it – despite my
wife’s best attempts to get me to relax, and treat the recipe as a
starting point rather than a set of rules that have to be followed.
‘Appetite’ doesn’t generally have recipes, but rather guidelines and
suggestions – and it was the book that finally got me to engage in wha
I was cooking, taste as I went along, and gave me some confidence in my
ability to produce something edible without strict instructions.

In
the same vein the quantities here are vague, and can, and should, be
varied to taste, and depending on how many you are serving.

  • Enough Sea Bass to go around – the one above served two, although without any scale clearly difficult o know how big it is!
  • Chilli – I used 1
  • Ginger – a bit – lets say about the same amount ginger as you have chilli
  • Some coriander
  • Lemon grass
  • Chinese Rice Wine (a.k.a Shaoxing wine, Shaohsing wine, Shao hsing wine, Hsao Shing wine)

Scale and gut the sea bass – or buy it that way of course – I take a
slightly peverse pleasure in doing this myself when I have the time.
Put the fish on a piece of foil – big enough to form an envelope around
the fish.

Bash
the lemon grass a bit – e.g. with a rolling pin – so it splits a little
(don’t overdo it – you don’t want it in pieces), and stuff it in the
cavity in the fish.

Thinly slice the chilli and ginger into
strips, and scatter around the fish, add some coriander (stalks and
leaves) – in the cavity and around. Finally add salt, and a small glass
of rice wine (making sure you’ve turned the foil up so it stays in the
foil)

Make an envelope out of the foil, sealing the fish inside.
You can leave this for an hour or two, or cook immediately if you want.

To
cook, put the oven on about 200 C, I recommend putting the foil parcel
is a shallow tray or dish just in case any liquid leaks out. For a
small sea bass it could take as little as 15 minutes – just check it
regularly after this – you want it so the flesh pulls away from the
bone easily.

This can be served with plain rice, but Nigel recommends (and I concur) a dipping sauce with it:

  • Rice wine
  • Sugar
  • Chilli
  • Dark Soy sauce
  • Lemon or Lime

Put equal amounts (by volume) of sugar and rice wine in a pan (for
2-3 people, 6 tablespoons of each). Bring this to the boil, and simmer
until it starts to get a bit syrupy – maybe 5 minutes or so. Finely
slice a chilli (again for 2-3 people 1 will be fine), and add to the
sauce, along with a tablespoon of dark soy (based on the same
quantities) and juice of half a lemon or lime (depends on the juiciness
and size – basically you don’t want to water down the sauce too much,
but just add a bit of zing)

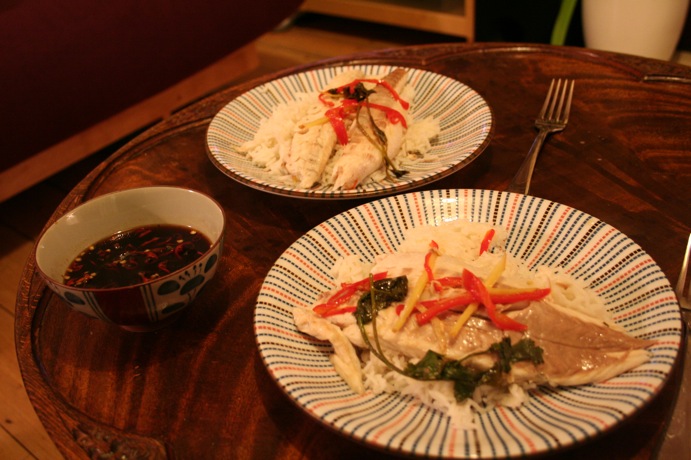
Sea Bass with Spicy Sauce

Sea Bass with Spicy Sauce


Red Snapper and Spicy Rice

Standard
Red Snapper with Spicy Couscous

Red Snapper with Spicy Rice

This is a variation on a Jamie Oliver recipe – I have to admit that I think the original is better than this variation (it’s in Jamie’s Dinners, called Omega 3 and Couscous if you are interested) – but we were missing some of the key ingredients, including the Couscous, so this is what we got instead (some of the quantities I’m guessing about)

2 fillets of red snapper (although you could use another fish – barramundi would probably work well)
Cherry Tomatoes (a small punnet – 125g I think)
1 Red Onion
1-2 tsp dried chilli
1 tsp fennel seeds
1 bay leaf (fresh is better – you can freeze them and use straight from the freezer)
Basmati rice (enough for 2 – I would say a cupful)
1 anchovy fillet

Cook the rice leaving it just slightly underdone

You want a pan that is going to fit everything in it – we use a deepish wide frying pan – ideally with a lid, although you could use foil to cover the pan as well.

Chop the onion finely, and cook on a low heat in some good olive oil, with the fennel seeds, bay leaf and chilli in a covered pan (you want the onion to get quite soft – it will take 10 minutes or so)
Chop the tomatoes into halves or quarters (depending on the size – you don’t want the pieces to be too small), and chop the anchovy as well, and add them both to the onion and herbs/spices. Season the mixture to taste.

Spread the tomato/onion mixture over the base of the pan, then spread the rice over the top, covering the tomato/onion completely. Lay the fish fillets, skin side up, on top of the rice, and cover the pan. Cook on a low heat until the fish is cooked through. You may well want to add a drop of water during the cooking – I usually end up adding half a cup or so. How long it takes to cook will depend on the size of the fillets – 10-15 minutes as a guide.

What you will hopefully get is a thick, spicy, jammy, tomato mixture at the bottom of the pan which you can mix through the rice.

Serve with a yoghurt dressing – yoghurt, lemon juice, salt, pepper, mint, coriander if you like.

I would recommend the original recipe – couscous takes the flavours of the tomato mixture better, and uses fresh fennel to give a bit of an aniseed edge.